E25 | Walpole Ranch with ADU | Batten Down the Hatches
Season 47 Episode 25 | 23m 42sVideo has Closed Captions
Zack's in town to help install wall paneling in the new mudroom.
Kevin O'Connor visits a North Georgia factory to see how luxury vinyl plank flooring is made, then checks its installation in the Walpole ADU. Zack Dettmore helps build durable MDF wainscoting in the mudroom, and a smart lighting system with wired and wireless switches illuminates the exterior of the renovated ranch and new ADU.
Problems playing video? | Closed Captioning Feedback
Problems playing video? | Closed Captioning Feedback
Funding for THIS OLD HOUSE is provided by The Home Depot and Renewal By Andersen.
Support provided by:

E25 | Walpole Ranch with ADU | Batten Down the Hatches
Season 47 Episode 25 | 23m 42sVideo has Closed Captions
Kevin O'Connor visits a North Georgia factory to see how luxury vinyl plank flooring is made, then checks its installation in the Walpole ADU. Zack Dettmore helps build durable MDF wainscoting in the mudroom, and a smart lighting system with wired and wireless switches illuminates the exterior of the renovated ranch and new ADU.
Problems playing video? | Closed Captioning Feedback
How to Watch This Old House
This Old House is available to stream on pbs.org and the free PBS App, available on iPhone, Apple TV, Android TV, Android smartphones, Amazon Fire TV, Amazon Fire Tablet, Roku, Samsung Smart TV, LG TV, and Vizio.
Keep Exploring

This Old House Insider Newsletter
Get This Old House exclusive stories, tips, and behind-the-scenes information delivered right to your inbox every month.Providing Support for PBS.org
Learn Moreabout PBS online sponsorshipKevin: Today on "This Old House"... Our homeowners are using luxury vinyl tile in their house.
So I've come to north Georgia to see how it's made.
Zack: So I'm in the mudroom here, and I'm loving this wainscoting.
So can I get stuck in here and help you today?
Adrian: Sure.
Why not?
Kevin: And we'll show you how to install a smart light-switch system.
♪♪ Man: Ahh.
That's it.
♪♪ ♪♪ ♪♪ Kevin: Hey there.
And welcome back to the backyard of our Walpole, Massachusetts, project, where you can see we have gotten ourselves some snow.
A winter blizzard dropped 21 inches on us this week, but that has not slowed down our general contractor, Jared, Kevin, and their crew from keeping this project moving -- a project that includes two buildings.
We've got the original house here, a 1970 ranch that is undergoing a remodel.
And then we've got the new build here, of the ADU, or accessory dwelling unit.
And this is where one of our homeowner's parents are actually gonna move in and then share this space back here.
So today Zack Dettmore has come back up to help us with some millwork install.
But first let's have a look inside the ADU.
So, the total square footage for the ADU is 900 square feet, which is the maximum allowed by the Massachusetts state law.
Now, you can see there's been a lot of progress, because last time we were here, we were at the framing stages.
And this partition wall right here is what separates the ADU from the bonus space and then the original house behind it.
This has to be a fire wall.
So back then, we were actually putting in mineral insulation, extra-thick drywall, making sure we had the appropriate burn time on this.
The upper and lower cabinets are in.
Some of the full-size appliances are going in.
There'll be a sink right here.
And then on this side, full-size refrigerator.
We're still waiting on the quartz countertops, but this is gonna be a very luxurious kitchen for an ADU.
As you come back here, there is a second door into a -- Hey.
Dan, how are you?
Dan: Kev, how you doing, sir?
Kevin: Doing all right.
I was gonna say into a mudroom.
Have I got that right?
Dan: It's a laundry room and mudroom, believe it or not.
Kevin: Laundry room/mudroom.
I see the hookups for washer and dryer.
Dan: Yeah.
Full-size washer and dryer, which is kind of unusual for an ADU.
But it works 'cause I designed it that way.
Kevin: There you go.
And what's this?
Dan: This is a utility sink, so I have room for both.
When I put them together, I realized I could slide the washer/dryer to the side and have room for a utility mudroom sink.
So when my father-in-law comes in from the backyard covered in grass or dirt, he can put all this stuff here, clothes in the washer, and maybe I get some free lawn care out of that.
If you make the in-laws work, they should also be clean.
Dan: Absolutely.
Kevin: Smart man.
All right.
So tucked in back here is one of two bathrooms -- full bathrooms.
This one is gonna be a guest bathroom.
But you can see that it's got a full shower, it's got the toilet, and then it's got a nice big vanity.
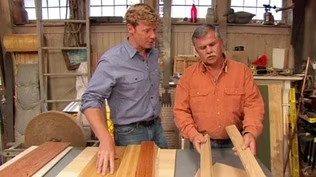
And that's because the other bathroom is gonna be off of the primary, where you can see the flooring is going down.
All throughout the ADU, they chose the same look, and it is this.
They're using luxury vinyl plank.
And this is a birch look.
So we're gonna see it installed, but I also thought it'd be nice to see it manufactured.
So that takes me on a trip down South.
♪♪ If you want the look of wood floors without the price tag, one option is a vinyl floor product that is engineered to look like natural wood, but with the durability and water resistance of vinyl.
I'm in a factory in north Georgia, where it's made, to get a tour from Daniel Green, the director of operations.
Hey, Daniel.
Nice to meet you.
Daniel: Hey, Kevin.
How are you?
Kevin: I'm doing all right.
So tell me about this product.
Luxury vinyl tile.
What goes into it?
Daniel: Well, it starts with PVC, which is vinyl, such as in siding, windows, doors, PVC pipes... Kevin: Use it everywhere.
Okay.
Daniel: ...everywhere.
And the next ingredient, which is about 50%, 60% of the makeup, is calcium carbonate -- limestone.
Kevin: So mix those two back there through a series of hoppers or whatever, and we end up with, you know, our plank?
Daniel: Yes, sir.
This is waterproof, impact-resistant, very, very stable, doesn't move, doesn't need much acclimation before you put it on a floor.
Kevin: Right.
Except we don't want it to look like this.
We want it to look like this.
And how do we get that?
Daniel: We go through our second process, where we direct-digital-print right onto that substrate and emboss it, and then we'll finish it in the last section.
Kevin: And is all that going on back there?
Daniel: Yes, sir.
Kevin: Let's do it.
So, what do we got here?
Daniel: This is the actual extruder itself.
Here's where we blend and heat up the PVC, run it through the slot die to make it out into a sheet good, and then we start controlling the gauge through these two nip rollers.
This is a four-millimeter product we're making.
So we start at about five, and we compress it down.
That helps with impact resistance and density.
So as it comes down the line, this is a cooling area.
We've got many stages of fans.
And as you can see by this point, it's already gotten a lot harder.
We trim the edges.
We've got about 1/8 inch tolerance we've got to get it to, where it makes exactly seven boards when it goes into the finishing area.
Kevin: This is how you get that dimension.
This is waste.
Daniel: Yeah.
And we take that, grind it back up, and we put it back in the actual formulation.
They're gonna get cut into a roughly 4x4 square.
Kevin: And no one has to touch it or lift it.
Daniel: Nope.
When it's time for that pallet to go away, a bell goes off, and they come get it.
We're here at the printer line.
You can see behind us, we are uploading two boards at once to come down the conveyor.
This first station is our cleaning station.
This gets any dust or debris off the boards.
This is our first primer.
This is just to ensure we get good adhesion, where nothing flakes off the boards at all.
Kevin: And primer being what?
Paint or ink?
Daniel: Paint.
Kevin: Paint?
Okay.
And this station here?
Daniel: This is our putty station, so this is where we fill any imperfections that may come out of extrusion to get the board good and smooth.
Kevin: And is this what you're essentially dropping onto that plank?
Daniel: That is.
Kevin: Okay.
And now it goes underneath what?
Daniel: These are UV lamps.
This is all solvent-free, UV-cured, very, very low VOC.
Kevin: And what have we got behind us here?
Daniel: This is our printer process.
So this is our digital printer.
That's what makes us unique.
Traditionally it's been what's called offset printing.
And basically you have a roller of a certain circumference that lays a particular color down.
And that, basically, you're limited by the circumference of that roller.
Here is more of an ink-jet/ laser-jet style of printing, where heads are actually spraying down, you know, each individual pattern as they come through.
Kevin: So therefore, if I have a roller, how much do I get?
Daniel: Typically seven boards.
So one slab and then that pattern repeats itself.
We're making 35 unique planks, which is roughly 80 square feet before you see that board again.
Kevin: So it's gonna look more authentic because wood doesn't have repeats.
Daniel: Right.
Kevin: And it comes out looking like wood over here?
Daniel: Yes, sir.
Kevin: Oh, yeah.
Daniel: Here's a first look of it coming out of the printer.
This is one of our rustic pine looks.
Kevin: And you're telling me that that knot right there, I'm not gonna see that again for how many boards?
Daniel: You won't see it again until the fifth board after that, but that turns into 35 planks once we profile it on the other side.
Kevin: Because you're cutting each one of these into seven.
Daniel: Yes, sir.
Kevin: No kidding.
All right.
Daniel: Now we're starting to do our buildup of our wear layer.
So we're putting down multiple layers of aluminum oxide.
Kevin: And what's the magic to aluminum oxide?
Daniel: It's the second hardest mineral on earth.
Kevin: Oh.
That'll work.
Literally, like, behind diamonds?
Daniel: Right behind diamonds.
Kevin: What does that get us in terms of toughness?
Daniel: It doesn't scratch.
It doesn't wear through.
Kevin: I like that.
Daniel: This is where we put our final coat on.
So this is their Evertuff topcoat.
That gives us our stain resistance, chemical resistance, fade resistance.
Kevin: And so as it comes through here and is cured, is this now ready to be cut into planks?
Daniel: Yep.
This is ready to move over to profiling and packaging and be cut into planks.
Kevin: So how are we going from 4x4 sheets down the planks?
Daniel: We rip it down the long ways, and from there it goes over into the profile machine.
That profile machine has a series of six blades.
You would think of it like a router that routs out each individual edge.
So here's the female edge.
And then here's the male edge on this side.
Kevin: 'Cause this is a click-down product.
We're not putting adhesives, necessarily.
We can just click it together, lay it.
Daniel: Click it together, lay it.
The pad is already attached on the back.
Sound deadening.
Sounds like real wood on your floor.
Kevin: And then are we boxing it up and shipping off?
Daniel: Boxing it up, and it's ready to be installed on your floor.
Kevin: Well, I know I very much appreciate the tour, but our homeowners really appreciated having it in their house back in Walpole, so thank you for both.
Daniel: Pleasure having you.
Kevin: All right, Daniel.
That's terrific.
♪♪ ♪♪ The flooring install in the ADU is almost done, compliments of Jay and his crew.
Jay, how are you?
Jay: Good, Kevin.
How you doing today?
Kevin: I'm doing all right.
Thank you.
So LVP all throughout the ADU.
Jay: Yes.
And in the basement of the ADU.
Kevin: And in the basement.
Okay.
And then, in the main house, we are talking about this?
Jay: Yes.
This is a 6-inch flat-sawn white oak engineered with a plywood backer.
It's got a four-millimeter wear layer.
A lot of sanding left on that floor.
Kevin: So that's interesting, because this is not prefinished.
So this goes down, and then you guys give it a light sand and a topcoat.
Jay: Correct.
There'll be three coats of a water-based poly on top of that.
Kevin: So hence the square edge and, as you say engineered.
But that means that we've got a layer of real wood and then we've got the stability of that engineered core right there.
All right.
Yeah.
That's handsome-looking stuff.
And then LVP back here.
Also handsome.
Jay: Yes.
This floor here, the luxury vinyl plank -- very durable, cost-effective, easy to maintain.
Put it in.
Click floater.
You're done.
Kevin: Yeah.
Right material.
Sort of in the right place.
Right price point and all.
We saw the little edge being made for the click.
What do you think about on the install?
Jay: It's a very simple install.
Click floater.
Kevin: I know that's just a sample piece or whatever, but... Jay: As simple as it sounds.
Just click it in, tap, tap.
Nice and snug.
Jay: That's it, right?
So you get the seam and alignment that you want right there, and if it was not a scrap piece, we'd have a click connection there on two sides.
Jay: Yep.
On our butt ends, it's all locked in.
Goes quick.
Kevin: I'll get out of your way.
'Cause I know you guys are gonna be moving, but I appreciate it.
Jay: All right.
Thank you very much, Kevin.
Take care.
♪♪ ♪♪ Hey, Kevin.
Good to see you.
Smith: Good to see you.
Kevin: So, looking for a quick update on all of your progress.
And here in the primary, fill me in.
Smith: So we had the his-and-hers closet here, which is now just going to be for Dan.
Kevin: No longer sharing that.
He gets his own.
Smith: And then over here, we have Jill's closet.
That was a couple months ago you and I removed this wall.
Kevin: Cut through it here.
Smith: Added 10 feet to accommodate her primary closet.
And then also over here, we had an odd bathroom that we infilled here.
Kevin: Little half-bath, right?
Smith: Little half-bath here.
And then over here, we added the linen closet.
Kevin: Ah.
So you used that half-bath space for right there.
And look at this.
Luxurious, huh?
Smith: Yeah.
It's beautiful.
We have a double vanity here.
Kevin: That's gonna be great.
And your shower.
Double shower, actually, back in here.
Two showerheads.
Smith: Dual showerheads.
Radiant floor.
They're styling.
Kevin: They're not gonna have to share anything anymore.
Smith: No.
Kevin: Thank you.
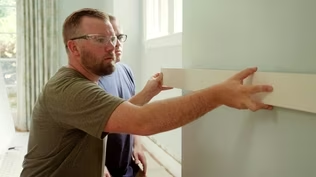
♪♪ Zack: So, we're here in the addition, and there's this amazing mudroom/laundry room off this side.
And at the end there, there's a nice powder room.
But you'll notice one thing: This door is missing.
The bad news is this has been delayed, so they were holding off on installing this amazing wainscoting, which not only looks better, but it's a lot more durable in a high-traffic space.
But we were just told the store was delayed further, and the painters need to wrap up their scope of work.
So I'm here with Adrian, our amazing carpenter.
So what's the first step here to sort of get this moved along?
Adrian: Yeah.
The first step is to figure out where our casing of that door is gonna end.
Zack: Okay.
Adrian: And then from there, we can measure our stiles and divide it equally.
Zack: All right.
Let's do it.
Adrian: Okay.
Let's go to it.
So this is our rough frame, and we're gonna be an inch over the rough frame to give us enough space to put our jamb.
Right here we have our casing.
It's gonna end up right here.
And this right here is where our rail is gonna start -- Like 4-inch rail.
Zack: Got it.
Because the jamb is three-quarters, and you want a quarter of shim, you want to basically hold this 1 inch out from there.
Adrian: Yes.
That's exactly right.
Zack: All right.
So I can hold an inch for you.
Adrian: That's right there.
Zack: Okay.
So that's the end of the rail.
Adrian: And this is where the casing ends.
Zack: Okay.
Got it.
And then you're gonna open that.
Zack: Where do you want me to get this?
Against the 2x4?
Adrian: I think if we cut it up to 75, it will be excellent.
Zack: All right.
So should we get cutting?
Adrian: Yes.
Let's go for it.
Zack: All right.
I asked Dan to help so he really appreciates what goes into this.
Adrian: Okay.
Let's get him.
Zack: All right.
Let's do it.
Hey, Dan.
Dan: Hey.
What's up, Zack?
How are you doing?
Good to see you.
Zack: Good to see you, too.
Adrian: Dan, how are you?
Dan: How are you, sir?
Adrian: Good to see you, buddy.
Dan: Good to see you.
Zack: So, are you making everything out of MDF?
Adrian: Yes, everything out of MDF.
Zack: It's a nice move because this moves about half as much as wood.
Adrian: Exactly.
It's good on paint too.
Zack: Yeah, it looks like... Adrian: Like glass, kind of.
Zack: All right.
What do we need to do to get our cutlass going?
Adrian: Okay.
To get our cutlass going, we're gonna lay out our panels.
Zack: Okay.
We want to use this again?
Adrian: Yes.
Like we did earlier, we're gonna hold that an inch.
That's where our jamb is gonna be.
Zack: Okay.
Got it.
Adrian: Then mark where our casing and rail is gonna be.
That's our casing and the rail.
All right.
We do that on the opposite side, too.
And then from there, we mark our center.
So we know our board is 75 inches long.
This is our center.
We're gonna measure 2 inches on either side.
So we got 2 inches in here and 2 inches in here.
Now this is our center stile.
And we also have to see where -- Our baseboard is 5 1/2".
And then 4 inches, which is our rail for the bottom.
Now we just have to transfer those marks all the way around.
Zack: Then you're gonna add the baseboard and the chair rail after this is done.
Adrian: That's exactly right.
Zack: All right.
So let's get cutting.
Adrian: Let's get cutting.
[ Saw whirring ] Our rail is gonna be 42 5/8" right here.
[ Saw whirring ] Zack: These two outside stiles are the right dimensions, so they can basically be finished.
But we've got to cut the bottom, the top rail, and then this.
Adrian: And then this rail in the middle.
Zack: Okay.
Dan: Let me grab this box.
Adrian: Poke it through.
Come up.
Zack: Oh!
Beautiful!
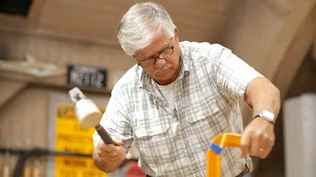
♪♪ So now the left and right stiles are going in.
Now we can measure for the bottom and top rails.
♪♪ Now we are fitting together the top and bottom rails into those biscuit joints with some glue.
That'll really keep those joints from opening up and being seamless.
[ Nail gun clicking ] ♪♪ And now we're installing the chair rail.
Adrian: Okay.
Now we just have to clean it up and sand it in place.
♪♪ Kevin: Underneath our ranch is a full basement, with part of it used for finished living space, and then part of it's sort of a utility room that adjoins the basement under the ADU.
Sean, good to see you.
Sean: Kevin, how are you?
Kevin: I'm doing all right.
So a little bit of electrical back here.
Service for both buildings or just the one right here?
Sean: This is just the one.
So it's a 400-amp total service.
This is just a 200-amp panel serving the main house here.
Kevin: We got another 200 for the ADU.
Sean: We do.
Correct.
Kevin: Beautiful.
All right.
And why do we have two panels here?
Sean: There was additional circuits needed over here for additional kitchen appliances, the garage, the condensers, things like that.
Kevin: Would've filled it up.
Sean: Would've filled it up, so we got two.
Kevin: And we're talking smart lighting right now.
Are we talking smart breakers?
Sean: We are not.
The breakers don't really have anything to do with it.
The smart lighting system basically gets wired like a traditional system.
So the breakers obviously power that.
But this here is the brain or the hub of the smart lighting system we're installing in this home.
Kevin: Power and Ethernet, it looks like.
Going to where?
Sean: You just got to find the router, get it plugged in the router.
So in this instance, the router is down here.
But if you were to do this in somebody else's home, where the router was upstairs, it could live upstairs.
Kevin: So this is just your traditional router that gives you Wi-Fi through the house and all of that?
Sean: That's correct.
Kevin: Okay.
When I hear "smart lighting," I'm thinking about, like, remote control for my phone.
What else is sort of on that laundry list?
Sean: There's lots of stuff.
I mean, you can set scenes.
You can set schedules -- You know, coming home from work, having lights on.
You no longer have the ticking time clocks in your basement like people used to have.
So this little device, through radio frequency, basically, communicates to the switches, right?
Kevin: And is this a smart switch that you're holding?
Sean: This is a smart switch.
So as you can see, it looks like a traditional switch.
Kevin: Yeah.
It looks almost identical.
So this is a paddle-style switch on the front, same size.
I presume it's got all the same conductors.
There's one extra there.
Sean: So you can do a three-way here.
These smart switches actually do require a neutral connection, too, where your standard switches don't.
But you have a neutral in your boxes, so you'll be okay.
Kevin: That explains the conductors.
So if this is just traditional wiring and the communication's wireless, can I pull out any traditional switch and replace it with one of these?
Sean: You could.
You could go in anybody's home and retrofit these switches, take out the standard switch, put in the smart switch, and now you're on to a lighting system.
Kevin: Beautiful.
Have you put any of these upstairs yet?
Sean: We've done some by the front door if you'd like to see.
Kevin: I'd love to.
Come on.
Come with me.
So, wired by the front door.
This is you?
Sean: This is us.
This is a four-gang switch box.
And this box consists of one traditional switch, and then three smart switches.
Kevin: Which is traditional and which ones are the smarts?
Sean: We have a traditional switch control on the inside lights here.
We've got a smart switch here, which will control some recess on the front porch, a smart switch here, which will control sconces.
This one is one of these remotes.
Kevin: All right.
Before you get to that, though, let me just get to the wired.
So you said this is sconce.
May I?
Sean: That's sconce.
Yeah.
Kevin: And I can also do that via the app.
Sean: Correct.
We can do it from the app.
So on your app, same thing.
We can turn this light off.
We can turn the light back on.
Or you could even dim it down.
Kevin: And then you can, obviously, in the app, set a timer, create some scenes, all good to go.
Sean: Correct.
Kevin: Pretty straightforward.
Now, what's this wireless you're telling me about?
Sean: So, this wireless one is basically your remote.
With the plate on, it looks like a standard switch.
But what this one is controlling is some landscape lighting he's gonna have on the stair treads as he comes up the front of the steps.
Kevin: Why'd you do that wireless?
Sean: So, you need a low-voltage transformer to control those lights 'cause they're low voltage.
So we chose to house that down in the mechanical space.
So with that being said, it's wired down there and it's controlled through the radio frequency up here.
Kevin: Pretty smart.
Sean: It is pretty smart.
Kevin: Okay.
And I presume I can choose what I connect the wireless switch to.
Sean: You can.
So this one in your hand, actually, we are currently programming this to do all the outside lights.
So Dan has asked us that with one click of the button, he can turn all the outside lights on or he can turn them all off.
Kevin: Such a dad move.
Sean: It is a dad move.
Kevin: If he hears a bump in the night, he wants to floodlight the whole place up.
Or if the car comes home too late with the daughter -- Boom.
Sean: This is true.
Kevin: Oh, my gosh.
Okay.
So you just go around, you pick your circuits, you program this, and then that wireless gives you control over those.
Sean: Yep.
Kevin: Awesome.
Okay.
So even though this is new because we were down to the studs, this is a perfect example.
These could have been retrofitted.
Sean: They could have been retrofitted, yes.
Just pull those out and slap these smart ones in, and it'll work.
Kevin: Yeah.
Or even stick a wireless next to existing.
How many smart switches are you wiring for us?
Sean: We have a total of 12 in this house, and I actually have two left to do in the basement.
Kevin: I'll let you do those.
I won't hold you up any more.
But I can put this back on for you.
Sean: I appreciate that.
Kevin: Thank you, Sean.
Sean: Thank you.
♪♪ ♪♪ ♪♪ Kevin: All right, Kevin.
Looking good and some good progress.
Although you've still got a little ways to go.
How are you feeling?
Smith: Feeling good about it.
We got a few weeks left here.
Kevin: Yeah.
All right.
You can't rattle the guy, huh?
Do you believe him?
Zack: Yeah.
He's totally gonna get it done.
Right?
Right?
Smith: I don't have a choice.
Kevin: You do not have a choice.
All right.
Well, that is all coming up next time.
So until then, I'm Kevin O'Connor.
Smith: And I'm Kevin Smith.
Zack: And I'm Kevin Dettmore.
Kevin: The Kevins from Walpole.
That's it for all of us at "This Old House."
Zack: Looking good.
I'm excited to see this one.
♪♪ Kevin: Next time on "This Old House" -- After nine months, it's moving day in Walpole, Massachusetts.
And for the first time, we have a double homecoming.
With the renovation of a '70s ranch and the addition of an ADU, or accessory dwelling unit, a former active-duty military family and the grandparents are home.
Tom: This place turned out fantastic.
Smith: Thank you.
Tom: So I got to ask.
You guys have any challenges throughout this whole project?
Kevin: That's next time.


- Home and How To

Hit the road in a classic car for a tour through Great Britain with two antiques experts.


Support for PBS provided by:
Funding for THIS OLD HOUSE is provided by The Home Depot and Renewal By Andersen.