
E3 | Add Hose Spigot; Cover Crops | Ask This Old House
Season 25 Episode 3 | 23m 42sVideo has Closed Captions
Adding a hose spigot; planting cover crops; revisiting best of cutaway demonstrations.
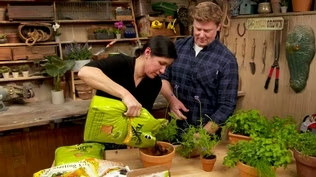
The team looks back at some of their most memorable cutaway demonstrations over the years. Then, Richard Trethewey helps a homeowner add an outdoor hose spigot using PEX. Jenn Nawada visits a farm to learn how they use cover crops to protect and improve their farming soil during the off-season. Then, she demonstrates how a homeowner can use cover crops in vegetable gardens.
Problems playing video? | Closed Captioning Feedback
Problems playing video? | Closed Captioning Feedback
Funding for Ask This Old House is provided by The Home Depot and Renewal By Andersen.
Support provided by:


E3 | Add Hose Spigot; Cover Crops | Ask This Old House
Season 25 Episode 3 | 23m 42sVideo has Closed Captions
The team looks back at some of their most memorable cutaway demonstrations over the years. Then, Richard Trethewey helps a homeowner add an outdoor hose spigot using PEX. Jenn Nawada visits a farm to learn how they use cover crops to protect and improve their farming soil during the off-season. Then, she demonstrates how a homeowner can use cover crops in vegetable gardens.
Problems playing video? | Closed Captioning Feedback
Where to Watch Ask This Old House
Ask This Old House is available to stream on pbs.org and the PBS app.
Keep Exploring

This Old House Insider Newsletter
Get This Old House exclusive stories, tips, and behind-the-scenes information delivered right to your inbox every month.Providing Support for PBS.org
Learn Moreabout PBS online sponsorshipKevin: Our experts travel across the country to answer questions about your house.
Today, we talk about one of our favorite teaching tools, the cutaway.
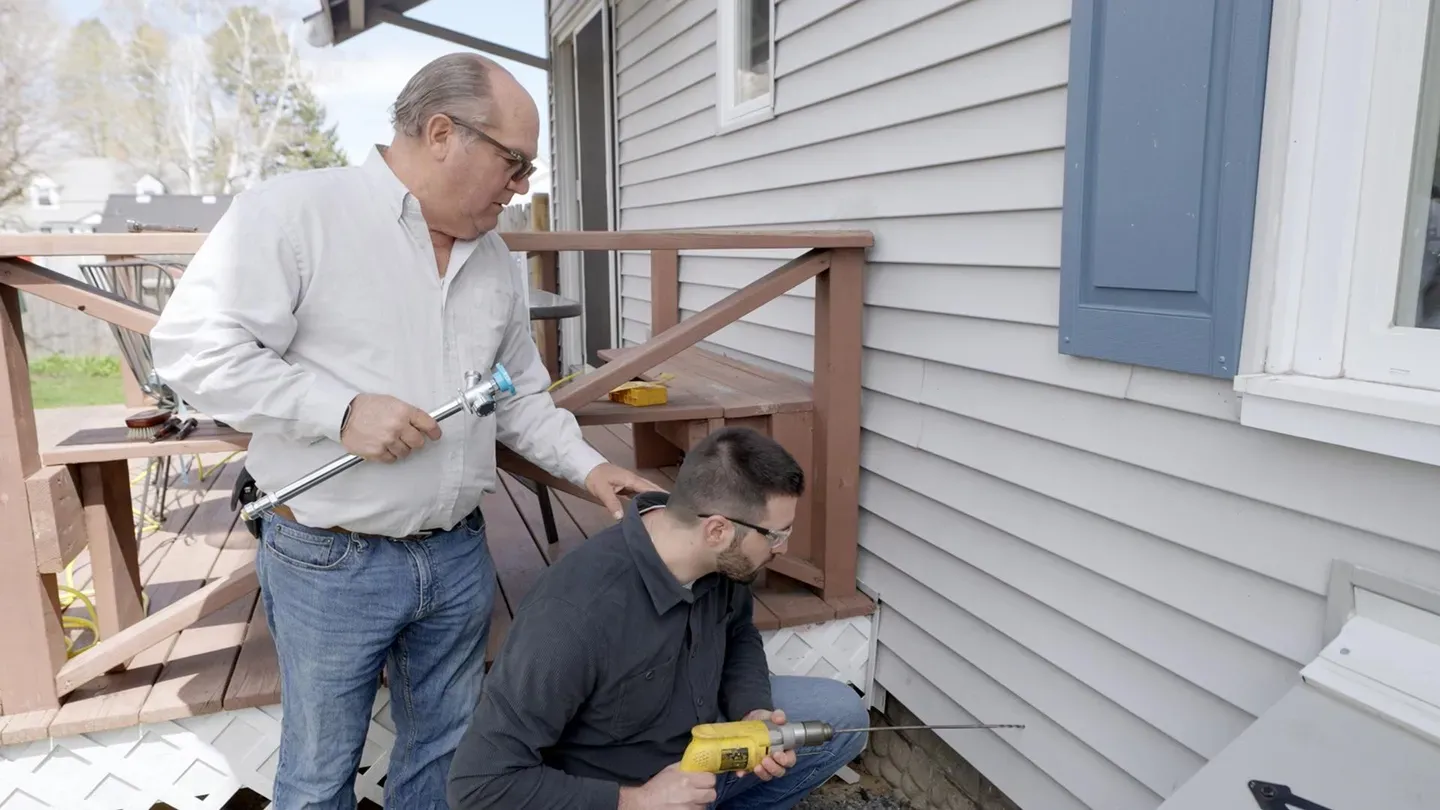
Richard shows a homeowner a DIY-friendly way to add a hose spigot to his backyard.
Richard: It's not completely do-it-yourself.
Kevin: Then, Jenn shows a homeowner how to use cover crops to maintain soil health through the winter.
Jenn: I can't wait to see if your tomatoes taste different.
Like, if you get more of a bumper crop.
♪ Kevin: All that's coming up next on "Ask This Old House."
♪ ♪ Kevin: Hey, there.
I'm Kevin O'Connor, and welcome back to another episode of our 25th season of "Ask This Old House."
On "Ask TOH," we love all of our tools, but one thing we specifically love are our teaching tools.
Richard: Here it is in cutaway.
I brought a cutaway.
Cutaway here.
Little cutaway right here.
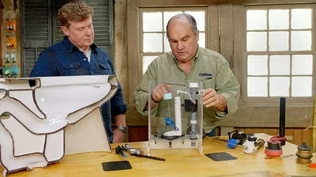
Here's a cutaway of a toilet.
This is what it looks like in a cutaway.
Typical cutaway of an air vent.
Kevin: I've lost count.
There's been so many cutaways.
I don't know if you guys have been keeping count.
But does anyone remember when we did the first cutaway?
First season, we took a dishwasher and cut it in half.
You'll see evidence of water that has leaked down here.
Man: You turn it off, it breaks the tabs.
No power to the light fixture.
Richard: If you look right here... See it right here?
Lookit right here.
Kevin: Do you think that's the magic behind the cutaway?
The fact that it reveals the secret sauce?
Richard: Right.
And many people have been using things like this for their whole life and don't know what's inside it.
I love the aha moments, when you show somebody in a cutaway, and all of a sudden you see the light bulb go off, and then they get it forever.
If they see it and they understand what's going inside, it demystifies everything, so... ♪ Kevin: Mauro, when they asked you to do your first cutaway, did you feel like you just got called up to the major leagues?
Mauro: Absolutely.
Force the water and the paint underneath the ferrule that causes the bristles to get damaged.
Kevin: Who knew the magic behind a toilet?
Who could know the magic behind a toilet?
Richard: And the place where the stoppage normally happens is up inside this passageway down here where it gets slightly smaller.
Kevin: Sure.
Tom: The thing that gets me is the cutaway that you do with the water heater.
Richard: I thought we would do a little autopsy.
[ Motor whirring ] Tom: We're drinking this water.
Richard: I know!
Tom: It's so clean, and then you open up that water heater, it's, like, full of rust.
It's like, "Whoa!"
Kevin: This is potable water.
Richard: With a little bit of rust.
Kevin: Love that, Dr.
Trethewey.
Very nice.
Well, listen, thank you all for being teachers for so many years.
Richard: It's been fun.
Kevin: It helps.
Tom: Love doing what we do.
Richard: Nice little place you got here, Nick.
Nick: Thanks for coming by, Richard.
So, we bought this house about four years ago, and we're looking to get some projects done.
We have a baby on the way.
Richard: You do?
Nick: Yeah.
Richard: Congratulations.
Nice.
So, what's -- what's on the list of projects?
Nick: So, we're looking to get a hose in the backyard 'cause, right now, we only have one in the front yard.
Richard: All right, well, here's the deck.
It looks like a perfect spot right here.
Nick: Okay.
Richard: We can maybe go through the sill right here, if it lines up inside.
Nice place for the hose right here.
Nick: Okay.
Richard: Let's see what we got.
You ready to help?
Nick: Yeah, definitely.
Richard: Good.
All right.
So, here's our sill right here.
That's where we want that new faucet to come in, right somewhere in there.
Nick: Okay.
Richard: And let's see what you got.
You got hot and cold water piping right here, so that's where we're gonna cut into.
Now, typically, I would just go out to the truck, get my copper, my torch, my solder.
But nowadays, this is more of a do-it-yourself project, so you're gonna end up doing it.
All right?
Nick: Awesome.
Richard: I'm gonna get you some choices so you can have some options.
Ready?
Nick: Yeah.
Let's do it.
Richard: All right.
♪ Are you ready for your lesson?
Nick: Yeah.
Richard: All right.
Let's start with the faucet we pick for the outside of the house.
Nick: Okay.
Richard: This is what you've got in the other part of your house, the conventional outside garden faucet.
You can see in the cutaway, it has a washer that sits outside the house and it closes down.
But it means that full city water pressure sits right here, and if you ever froze outside, this thing could split off the side of the house.
It's a nightmare.
So what I'd like to propose for you is this.
This is a frost-proof sillcock.
Still looks the same on the outside, pretty much.
But the shutoff point is way back inside here.
So it's in the conditioned space, so it can never freeze.
Nick: Okay, perfect.
Richard: All right.
Good.
So that's the beginning point.
Now it's a question of, how do we connect it?
So when you go to the home center, you see, look at all the stuff, all the choices.
Most people look at this and say, "Look how simple this is."
This is these push-to-connect fittings.
And they typically use them with copper.
Here's what it looks like inside.
So it has O-rings and then it has stainless steel barbs.
And so when you push it in, it locks in beautifully.
So they make a nice watertight connection.
We'll just put these all together, and it's done because you don't need any proprietary tools.
But what's happened in this industry, the plumbing industry, clearly PEX is becoming the product of choice, and now the proprietary nature of the tools, the price point has come down dramatically.
So now here's some of the choices.
Nick: Okay.
Richard: With what they call PEX-B, there are a couple of choices in the connections.
One is a crimp ring, a steel crimp ring.
And so that would come on here.
You'd push this on.
And then with a tool like this, you would then crimp that ring onto the outside of the pipe.
Okay?
They also make a thing called a crimp sleeve.
And this is a slight improvement.
This is stainless steel.
You see, it has a little witness mark right here to be sure that the pipe is fully inserted, and I like that.
Same tool works with it.
Okay?
So, now that's the two choices with crimp.
Now they also make a thing called a pinch connection.
So you can see it's a stainless-steel sleeve that ratchets on to it.
Now this comes on and has a slightly different tool that now will pinch that thing tight to cinch it right on the outside.
And I like that, too, because it's stainless steel, as well.
Okay?
So, those are the choices in crimp or pinch.
What I'd like to also show you is what they call PEX-A, and this is an expansion connection.
If I can take this sleeve... And it goes on to the pipe.
And now this doesn't fit in until you come along with that tool.
Why don't you get that for me?
Open it up all the way.
There you go.
Now expand it -- go.
Go, go.
Okay, good.
Now pull it out.
So, now what happens is, that sleeve made out of the same PEX material has a memory, and it'll pull that thing tight.
It'll make an absolutely tight connection with full flow on the inside and never let it be pulled off if you've had an expansion, contraction.
Nick: Perfect.
Richard: So it's really a cool connection.
These are fine.
This is my preferred method, typically.
All right.
So I did a little workshop to see what does everything cost.
And so with the valve, with these push-to-connect fittings, he ball valve, the T, the copper pipe, everything was over 200 bucks for all those parts.
Nick: Oh, wow.
Richard: Okay?
But there's no proprietary tool.
So, I looked at this, with the cinch connections, all the same -- with a tee, the ball valve, the fittings, and these connections, plus a tool, was 120 bucks.
Nick: Much better.
And then, the PEX-A, with all the fittings and the tool, was 150 bucks.
So it wasn't that much of a price premium between these two.
But it's interesting that it was less money than the copper.
Nick: Yeah.
Richard: All right.
So which one do you think we should do?
Nick: Sounds like PEX-A is the way to go.
Richard: You're so smart.
Nick: [ Chuckles ] [ Drill motor whirring ] ♪ ♪ Richard: There it is.
Good.
Now you got your hole.
Good.
[ Drill motor whirring ] Do a little silicone here.
All right.
You want to make a nice, tight water seal.
Now do the other one, please.
♪A All right.
I've turn the water off, and now it's time to cut our T in.
Nick: Right.
Richard: So, why don't we start -- The T's gonna go right about there.
Why don't you clean this with some emery cloth, and just so, when we cut it, we'll have a nice surface for those O-rings to seal against.
And now go the other side.
Yep.
All right.
So now we're gonna mark where we're gonna cut -- once on that side and once right there.
Why don't you to take this cutter, called an imp -- it's made for tight little spaces -- and put it on the pipe and just go, on those marks, and snug up that thumb wheel.
And then, the hardest thing is to do that first revolution, to go around and be sure that the cutter wheel goes back into the groove you cut on the first revolution.
You got it.
Takes longer than you think and longer than you want.
Snug it up.
You could cut this with a hacksaw, but it leaves a much more burred edge.
This is a much better... Particularly if you're gonna put those O-rings onto it.
[ Clicks ] Nick: There we go.
Richard: There it is.
So you did it.
Go ahead.
Loosen it off.
All right.
Nicely done.
Okay, let's put the T in.
To make the connection between the copper and the new PEX, we're using this push-to-connect fitting.
The copper-to-PEX T fitting is made exactly for this purpose, and it's really easy to install.
[ Clicks ] There.
You feel a click?
Nick: Yeah.
Richard: Okay.
Good.
Okay.
So, now this connection also can take PEX.
So go ahead and push that one into the branch.
Look at you.
Look at you.
So put that on.
There's your expanding tool.
And you do it three times and push in after each one, all the way, go in.
One more time, at least.
Okay.
Go ahead.
And now... Nice.
Hold it up about where the elbow would be.
So, the next thing is, just cut it, simple.
It's not completely do-it-yourself.
[ Both laugh ] And face it towards me.
Push.
Beauty.
One more.
Okay.
Ready?
Push it in.
Face it right back to the wall.
Carefully, Nick.
Push it right in.
Did it go in?
Did it seat in?
Nick: Yep.
Richard: You are such a pro.
Nick: [ Chuckles ] Richard: Awesome.
We can turn the water on.
[ Water flowing ] All right.
Normally, the homeowners get to do the honors, but you look like you're pretty ready.
I'll do it for you.
All right.
There it is -- water.
Nick: Perfect.
Richard: That is one thing off of your baby list.
Nick: Yes.
Thank you so much.
Richard: Well, best of luck with everything.
Nick: Thank you.
Richard: You've been great.
♪ Jenn: We get a lot of questions about how to winterize your vegetable garden and maintain soil health.
And cover crops are one of the most effective ways to do this.
Today, I'm here at this 500-acre farm in Rhode Island, and I'm gonna speak to the farm manager to see how they utilize cover crops in their practice.
Hey, John.
John: Hey, Jenn.
How are you doing?
Jenn: Great.
Good to see you again.
John: Welcome.
Yes.
You too.
Welcome to the farm.
Jenn: Yeah, it looks like it's cover-crop time.
Oh, it's cover-crop time.
It's very exciting.
Jenn: Can you give me a definition of what a cover crop is?
John: Yeah, sure.
A cover crop is a sacrificial crop that's grown to keep the soil in place, to keep it from eroding from wind and water, and to, in this case, this is winter rye.
This is a scavenger.
It's a great scavenger.
It's actually able to grow in the soil, go down with a deep root system, and pull up -- Yeah, pull up nutrients.
Jenn: And you don't need to fertilize, and it's purpose is, it's food for the microorganisms in the soil.
John: Absolutely.
They are feeding on this.
They are going to eat every bit of this crop.
They are going to manure it out.
Jenn: Mm-hmm.
Which is the fertilizer.
John: Which is called -- Yes, it's called the mineralization process.
And they're gonna convert it to a food that the next crop can actually eat.
Jenn: Right.
So you're not gonna have to feed the next crop.
John: That's correct.
Jenn: So, if a homeowner wanted to do a cover crop, whether it's in a raised bed or in the ground, what would they do, what time of year, for the winter?
John: Well, once their garden is finished for the year, they can take the seed and seed the winter rye.
Jenn: Okay.
John: And it will grow very quickly in the cold, and it will be here in the spring.
So, for instance, we're in New England in the springtime.
When do you start to till it in if it's at your own garden?
John: Right.
So, if you want to take a look at this now, it's, um -- it's at the stage where it's -- it's what they call headed out.
Jenn: Yep.
John: And their seed -- Now, that seed is not mature yet, but very quickly, that will become mature, and it will seed itself back.
That's too late.
Jenn: So you want to get it before it goes to seed.
Well, John, thanks for all this information.
It's been so informative, and I think it's very helpful.
John: Well, so happy to have you here.
Jenn: Yeah.
I'll come visit again.
John: Come back.
Jenn: All right.
Thank you.
♪ Amy: Hey, Jenn.
Jenn: Hey, Amy.
Amy: Nice to meet you.
Jenn: Nice to meet you, too.
So, you wrote in about winterizing your garden.
Amy: Yeah, I did.
Let's take a look at it over here.
You know, it's -- it's nice and big now, but we started kind of small, just two beds in the back, and we've expanded over the years.
Things are looking kind of rough.
Let me show you a picture of what it looked like in the summer.
Jenn: Well, it's supposed to look rough right now.
We're towards the end of the season.
Amy: Yeah, but you can see.
So, it was flowers.
We had carrots, some potatoes right here.
So you get the idea.
Jenn: It's so fun growing your own stuff.
But then, people get to this time of year and then just rip out everything.
And then you're left with bare soil, right?
Amy: Oh, exactly, yeah.
Jenn: So there's a solution that you can do that will help your soil and then your crops for the next year, and it's called cover crops.
Have you heard of cover crops?
Amy: I've never heard of cover crops.
Jenn: So cover crops are a plant that is planted in your garden.
Farmers and gardeners use this all the time.
It's to improve and protect the soil health.
They plant it between seasons or between crops.
So there's never a bare moment, so the soil stays alive.
Does that make sense?
Amy: That makes a lot of sense.
That'd be great.
Jenn: When soil is not protected, the wind, heavy rains, even the freeze and thaw, will wash it out, and then it just dissipates.
So what cover crops will do is help stabilize the soil and prevent that massive runoff, so you won't lose as much in your beds.
Amy: Oh, that's great.
Jenn: It also helps with water infiltration and suppresses weeds, as well.
Amy: Oh, great.
Jenn: Yeah.
Amy: Yeah, we have a problem.
Every spring, we have to come out and weed the beds before we even plant the new seeds or plants.
Jenn: Right.
So, with these in place, I think it's gonna give you successful crops for the years to come.
Amy: That's great.
What type of crops do you use as cover crops?
Jenn: That's a good question.
It depends on where you live.
So you have to know your climate and then what season you're going to be growing in.
Amy: Okay.
Jenn: Okay?
So, once you figure out all that stuff, you have categories -- the cereal family, which is wheat, rye, barley, and oats.
The next is legumes, which are peas and vetch.
They add a lot of nitrogen in the soil.
And then there's broad leaves, which are more of like mustards and buckwheat.
Amy: So, my daughter actually has celiac disease, so if we can avoid the wheat, the barley, and the rye, that would be ideal.
Jenn: Yes.
If that makes you feel more comfortable, no problem.
I'm gonna go to the nursery and get some seeds, and I'll be right back.
Amy: Okay, great.
Jenn: All right.
Cool.
♪ Amy: So, what do we have here?
Jenn: So, these are the selection for your garden.
I typically do wheat in raised beds, but I want to be cautious of the celiac with your daughter.
Amy: Yeah.
Jenn: So we're gonna use oats.
So, these oats are going to grow but then die back for the winter.
But that's going to be a lot of great carbon for the soil, and then it's gonna create, like, a mat ground cover.
But they will be brown, but leave them.
They'll be easy to turn over when you do that in the spring.
Amy: Okay.
Jenn: Over here is a legume, and this is called winter peas.
So, this is a great source of nitrogen.
And then, in this bowl, I have a combination of the oats and the peas and added a third component, which is another legume called hairy vetch.
Okay?
So that is going to also add nitrogen.
So I think the combination of these three will work well for your garden.
Amy: Okay.
That's great.
Will I be able to harvest any of these?
Jenn: So, cover crops are primarily grown to feed the soil, and that's it.
Amy: Okay.
Jenn: Not for an edible crop.
So when I come back in the spring, we want to get all of these before they go to seed, 'cause if it goes to seed, they'll spread throughout your garden, and you don't want that.
Amy: Okay.
So, I normally plant my garden mid May, around Mother's Day.
Does that...?
Jenn: Okay.
So, take that Mother's Day date, go back 2 to 4 weeks.
We want to -- I'll come back, then you can plant your vegetables.
Amy: That's great.
Sounds good.
Jenn: Okay?
So, first, we got to clear this out now, and then we'll put the seeds in.
Amy: Let's do it.
Jenn: I was thinking you could grab the veggies, and I'll take some of the flowers.
♪ We're gonna primarily focus on the raised beds.
♪ Cool.
Amy: Good job.
Should we have-five?
Jenn: Yeah.
♪ Next, we're gonna rake and turn over the soil.
♪ Okay.
Now the fun part -- seeding.
So what we're gonna do is, we're gonna broad cast these seeds in the bed.
So, gonna just essentially take it like this.
Or you could go, when you get fancier, just go like that.
Right?
Amy: Awesome.
Jenn: And then all we have to do is feather it in and cover it with a little bit of soil and then water.
Amy: Awesome.
Do you think we'll use this whole bag?
How much should we be using as we go?
Jenn: Typically, they say about 600 square feet per 1 pound.
♪ Amy: So, now that the seeds are in, how often do we have to water?
Jenn: So, I talked to my buddy John at the farm, and he said, water it once right after you put the seeds in and let Mother Nature do her thing.
Okay.
You should see some activity, the germination within the next couple weeks.
Keep me posted on that.
And then, I will be back in the spring to help you turn it over.
Amy: All right.
That's great.
Jenn: All right.
Amy: Thank you so much.
Jenn: Yeah.
It's so good.
Amy: Nice to meet you.
Jenn: I'll see you in a few months.
Amy: Sounds great.
Jenn: Take care.
♪ Amy: Hi, Jenn.
Welcome back.
Jenn: Hey, good to see you.
Amy: Good to see you, too.
Jenn: Looks like you've had some success here.
Amy: Yeah, I did.
Some areas are better than others.
Jenn: I think you've had great success here because it looks like the soil didn't erode away.
And all of this is gonna put amazing nutrients and nitrogen back into your soil.
What we're gonna do is clip them all at the base, and we're gonna set it aside and use it as a mulch.
Amy: Okay.
That's great.
I have a question.
Jenn: Yeah.
Amy: Because I wanted to start my onions and potatoes in those beds, I didn't cut it back.
I just turned it in.
Is that gonna be a problem?
Jenn: There is no problem here.
I think it's all trial and error and test it out.
'Cause you grow the same crops in those beds, right?
Amy: Mm-hmm.
Jenn: So see if it's different this year.
See if the flavor's different.
See if you get bigger growth or more abundance of crops.
So, yeah, I don't think you can do wrong.
I think this is all good.
Amy: Okay, cool.
Jenn: So, I have my clippers and a pair for you.
Amy: Oh!
Awesome.
Thank you.
Jenn: And we might as well just start with this bed.
Amy: Okay, great.
Jenn: And then just cut it, and we'll make a pile.
Amy: After I've planted my seedlings, is there a risk that some of these, like, pop back up, grow again?
Jenn: You're definitely gonna see some.
And what I would do is just pull them then, because especially this one, the -- the vetch, that would be problematic if it goes to seed, which means it flowers.
And when the flower becomes spent, it would disperse seedlings.
And then you don't want that in your bed.
But the benefits outweighs the cons.
So I would just pull them, and you'll be fine.
Amy: Okay.
Sounds good.
Jenn: Yeah.
All of these are gonna be a fantastic mulch.
They're really rich in nitrogen.
And when it breaks down, nutrients are gonna just seep back into the soil.
And then, when you go to plant, you could just go around it, plant your plant, and keep that as the mulch.
Amy: Oh, no kidding.
Jenn: Yeah.
And that'll also help suppress weeds.
Amy: Oh, wow.
Awesome.
Jenn: So, yeah.
This is exciting, right?
Amy: Yep, it is.
I can't wait for the weed protection.
Jenn: Yes, that will be great.
I can't wait to see if your tomatoes taste different.
Like, if you get more of a bumper crop.
Amy: Yep.
♪ All right.
So, everything's clipped back.
And what we're gonna do is pull it all back, and then just go in 2 to 3 inches and lightly turn it over.
Some people like to just leave it in place.
It all depends on what crops you're growing.
Amy: And I'm just lifting to almost release the roots.
Jenn: Exactly.
Amy: Okay.
♪ Jenn: All right, Amy, I think you're ready to go.
In, I'd say, two weeks, let it start to break down, put a little water on it, and keep that journal going.
'Cause every year is different.
You can see what works this year, apply it to next year, and, otherwise, good luck.
Amy: Okay, great.
Thanks so much.
I'm so excited to get started.
Jenn: Yeah, sorry.
Sorry about that.
Amy: It's okay.
Jenn: All right.
Thanks.
That was fun.
Amy: Thanks.
♪ Kevin: Next time on "Ask This Old House"... Ross breaks down the various types of insulation available and the pros and cons of each.
What do I pick for my house?
Ross: Yeah, it's a great question.
Kevin: Then, does your front door stick or have trouble staying closed?
Nathan helps a homeowner troubleshoot why her door isn't working properly.
Woman: Very smooth.
Kevin: All that on "Ask This Old House."


- Home and How To

Hit the road in a classic car for a tour through Great Britain with two antiques experts.

 New Episode









Support for PBS provided by:
Funding for Ask This Old House is provided by The Home Depot and Renewal By Andersen.