
E3 | Essex County Colonial | Knock on Wood
Season 48 Episode 3 | 23m 42sVideo has Closed Captions
Zack and Charlie plan a vintage tile pattern for the primary bathroom.
Kevin O'Connor checks in on the primary bathroom, where Zack Dettmore and Charlie Marshall plan a vintage tile pattern. Architect Dan Kopec shows Kevin a full-scale mockup studio where the floor plans come to life. Meanwhile, In the basement Zack fixes a sagging ceiling. Richard Trethewey also helps install a space-saving wall-hung toilet downstairs.
Problems playing video? | Closed Captioning Feedback
Problems playing video? | Closed Captioning Feedback
Funding for THIS OLD HOUSE is provided by The Home Depot and Renewal By Andersen.
Support provided by:


E3 | Essex County Colonial | Knock on Wood
Season 48 Episode 3 | 23m 42sVideo has Closed Captions
Kevin O'Connor checks in on the primary bathroom, where Zack Dettmore and Charlie Marshall plan a vintage tile pattern. Architect Dan Kopec shows Kevin a full-scale mockup studio where the floor plans come to life. Meanwhile, In the basement Zack fixes a sagging ceiling. Richard Trethewey also helps install a space-saving wall-hung toilet downstairs.
Problems playing video? | Closed Captioning Feedback
Where to Watch This Old House
This Old House is available to stream on pbs.org and the PBS app.
Keep Exploring

This Old House Insider Newsletter
Get This Old House exclusive stories, tips, and behind-the-scenes information delivered right to your inbox every month.Providing Support for PBS.org
Learn Moreabout PBS online sponsorshipKevin: Today on "This Old House"... Zack: Here in the framing stage, we're doing the perfect tile layout.
And to get it just right, we're using something called a story pole.
Kevin: Then... for so many homeowners, it is hard for them to visualize an architect's plans on paper, but here they come to life.
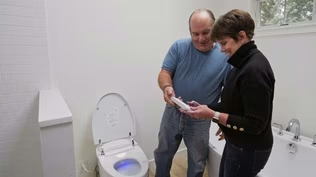
Richard: And we'll show you how to install a wall-hung toilet.
♪ [ Grunting ] ♪ Kevin: That's it.
♪ ♪ ♪ Kevin: Hey there.
Kevin O'Connor.
And welcome back to "This Old House" and to our project here in Essex County, New Jersey, where we are working on this gem, a house built back in 1893 and a renovation for a young and growing family.
Now, last time we were here, it was all about the demolition, most of which happened down on the first-floor kitchen, family room, and we'll see that in a minute.
But right now we're up on the second floor.
Center staircase right here.
And you can see most of the demolition on this floor were the old floors coming up.
This room right here is gonna be a big primary suite with a sleeping area here and a new primary bath in here.
Charlie, good to see you again.
Charlie: Hey, Kevin.
Kevin: Zack, good to see you.
Zack: What's up, Kevin?
Nice to see you.
Kevin: Yeah, good to be back.
So, primary bath.
Looks like you guys have got it framed out and laid out.
Zack: Yeah, the framers did a great job.
Just to bring you up to speed, we got the two vanities here.
Kevin: One, two.
Zack: We got a radiator that's gonna go under the window.
We got our water closet... and a big old shower right here.
Kevin: And we've also got a very fancy tile job, if I recall right.
You guys are going for a vintage tile and an old-school layout, right?
Zack: Exactly.
So a thing to remember is, back in the day, it was a lot of work to cut tiles, right?
They didn't have the nice wet saws like we have, right?
So not only did they have respect for the craft, but it was also really hard to cut tiles.
Kevin: Yeah, and these beautiful tiles you guys have picked, they've got a lot of sort of outside curves, inside curves.
And then we've also got them for the floor and the ceiling.
So if you're not cutting, the alternative is what?
Zack: Obviously we're not gonna shrink the bathroom drastically, but we will make modifications on walls where we have play.
Like, for example, this wall.
It's a really deep shower.
If we steal an inch or two from the back of this, that's not a big compromise for the homeowner, and it'll make the job look more intentional.
Kevin: Okay, and so how are you determining sort of the depth of the pack-out for this whole thing?
Zack: Well, we made this little mock-up.
We have this 2x4 that's the framing.
This piece of plywood represents the tile substrate plus the mud, which is the glue that holds the tile to the tile substrate.
Similar thing down there.
And all this is really doing for us is it's telling us where our first grout joint is.
So we've got a full tile here.
Above this, there'll be a half tile.
And all I have to do is measure from the framing, which is behind the backer, to here, and it gives me a dimension of 2 3/4".
So that's what we want to know.
So, on the inside corner, we have another mock-up.
And basically here we're gonna measure from the inside of the framing to the first grout line.
And that's gonna be 4 and 3/8".
So those are the two numbers we want to keep in our head.
Kevin: And what do you do with those two numbers or who does what with them?
Zack: So we're gonna give them to Charlie, and Charlie is basically gonna mastermind laying out everything, so he'll show you what to do next.
Kevin: Okay, Charlie, do you know you're the mastermind of this whole thing?
Charlie: So I've been told.
Kevin: So what are we doing with all those dimensions?
Charlie: Uh, to simplify this, I like to do a story pole based on some key measurements that we found in the shower area.
Kevin: And that first key measurement was 4 and 3/8", right?
Charlie: Yep.
Exactly.
So that 4 and 3/8" is gonna be our inside corner to our framing.
So that's a key number that we can start with off the edge of this story pole.
Kevin: Okay.
Charlie: So I'm gonna hook my tape here and mark 4 and 3/8", and that'll be the first mark on our story pole.
If you picture it, there's gonna be a tile wrapping the corner.
We're gonna have a 3-inch tile.
Kevin: Which is a half.
Charlie: Which is a half of a 6-inch tile.
And then we're gonna start our 6-inch story pole, which I've already done on the other side of this story pole.
And I can take this into the shower space, onto the walls, and mark fulls and halves around the bathroom.
And then, in this case, I've done it on the vertical.
So I have 3-inch increments with my 1/8-inch spacing from the floor going all the way up.
Kevin: Because that's the height of the tile.
Charlie: Correct.
Kevin: So will you show me that as you take it into the space, how that determines your layout?
Charlie: Absolutely.
Let's go.
Zack: Alright.
So, remember, if we weren't going through all this work and this was a simple tile, you prioritize the most obvious corners in a room, and then you have your cuts wherever they fall.
Kevin: Charlie's having none of that!
So what are you doing with your story pole?
Charlie: So we made that 4 and 3/8" on the inside corner.
And we know this outside corner, in order for it to wrap, needs to be 2 and 3/4" back, so we've marked that down here.
We know that 2 and 3/4" back needs to fall either on a grout line or a half of a tile.
So we're gonna set the story pole at a grout line and see how it works with this back wall.
Kevin: So you're starting with the grout line of a full tile.
And how it's look down there, Zack?
Zack: Looks good here, but over here, the stack is protruding beyond the wall surface, so I don't think that's gonna work.
I think we need to go further this way.
Charlie: So let's move the story pole down to a half tile on that 3-inch increment and see what that does.
Zack: Yeah, I mean, that certainly works here.
Charlie: So we're basically shrinking the whole shower by about 2 inches or so.
Zack: So we're gonna frame a new wall right here.
And then because we have these grout lines here, we now know how we can center our curb on a grout line, and we can center our drain on the center of the distance between the wall and the curb.
Kevin: Alright.
And are you guys ready to start packing out?
Charlie: Oh, yeah.
Zack: We'll use a laser level just to keep us honest and make sure we're going not only plumb, but square to these walls.
Kevin: Okay.
♪ ♪ Alright, well, uh, maybe we'll excuse ourselves, and you can finish it up for us, Charlie, and we'll check back in on you?
Charlie: Absolutely.
Kevin: Alright.
Thanks a lot.
Zack: You got this.
Thank you.
Charlie: Thank you.
♪ Kevin: So there are some changes here for the back of the house.
This deck is gonna be cut right about here, because at grade, we're gonna have a new entrance into the house.
The old entrance into the kitchen stays.
And then that new entrance I was talking about right there into the old bathroom that is now a mudroom.
On the other side of that, family room.
Some stairs coming up into the kitchen.
Now, it's wide open spaces right now with just the partition walls, but the homeowners, they want to know, you know, where is the island?
Where are the cabinets, the countertops?
Dan, our architect.
Good to see you again.
Dan: Kevin, great to see you.
Kevin: You have measured everything for us and put it into a set of plans.
But these don't always work for the homeowner.
Dan: Sometimes they don't, right?
The homeowner has asked us to solve the spatial puzzle, and in order to do that, I've got to document all of the existing conditions and then get that into a set of two-dimensional plans here that our craftspeople understand.
Kevin: There's a ton of information on here that doesn't do the homeowner any good.
Dan: This works for the trade, but making sure the homeowners feel like they're confident in their decisions and they're getting what they want, we do our best to make sure that their expectations are met.
Kevin: So in a perfect world, like, what does that look like?
Dan: Well, in a perfect world, you'd want to be able to prototype this, and we can't do that in the building industry, but what we can do... There's a place we can go and see this at 1:1 scale and walk through it before it would get built.
Kevin: Really?
Dan: Yeah.
You want to go?
Kevin: I would love to go.
Dan: Let's go.
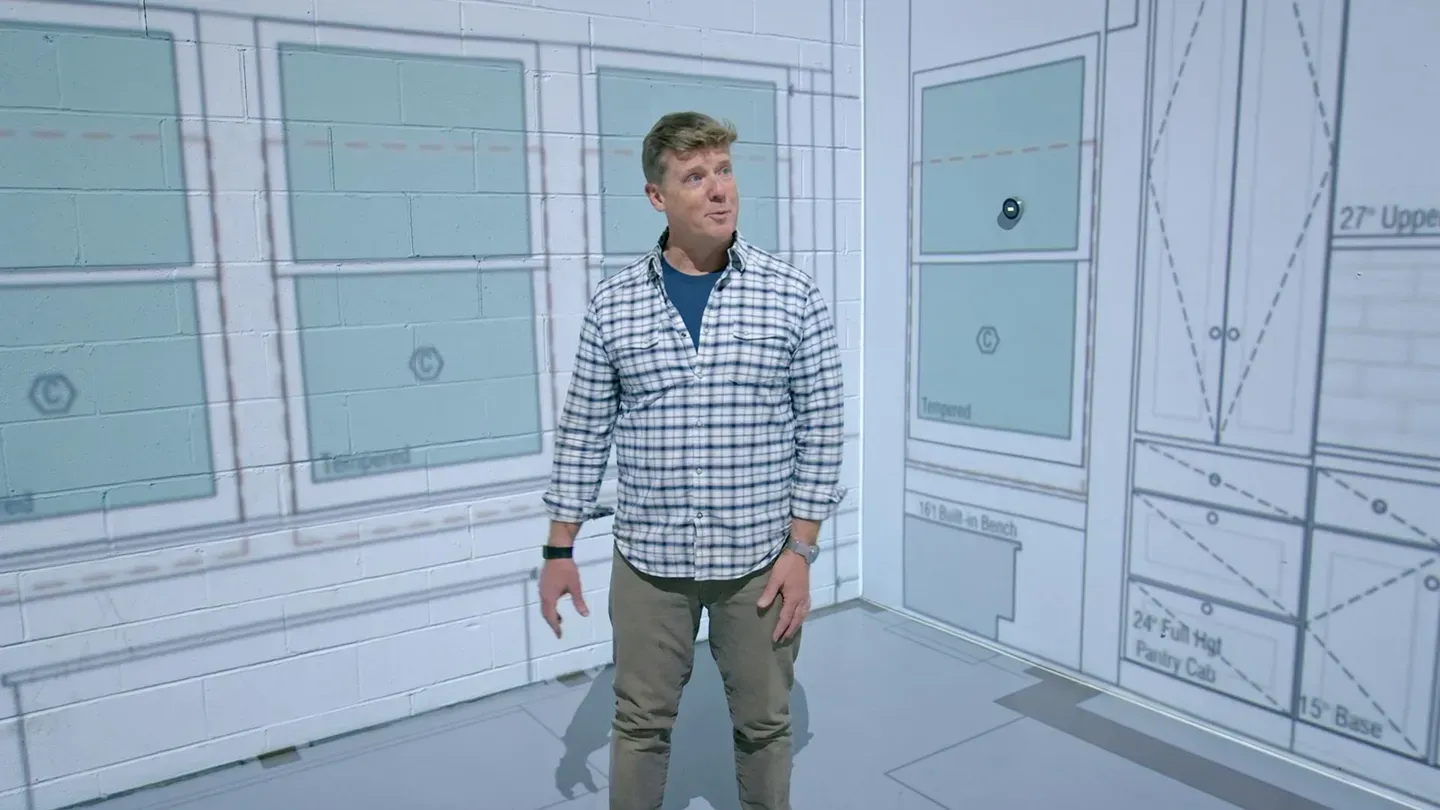
♪ Kevin: Wow.
Look at this.
Dan: Look at this.
Right?
5,000 square feet.
20-foot ceilings.
16 projectors allow us to put our drawings into full-scale real life.
Kevin: So at 5,000 square feet, you could pretty much put any home's floor plan in this.
Dan: Correct.
Like I said, be able to see the elevations on the inside and the outside of the house, as well.
Kevin: So this is Ethan and Harley's house?
Dan: We have their plans in here, right.
And so let me show you.
Here is the door we just walked out of.
Kevin: That's the old kitchen door.
Dan: Right.
Kevin: So let's come back in.
Dan: We're gonna come back into the kitchen here.
Kevin: So backyard behind me.
Dan: Correct.
Behind you.
Windows to the backyard.
Kevin: So I am seeing floor plan.
You've got the outline of an island.
And then this line right here.
I presume this represents counter depth?
Dan: Correct.
And so this allows me to have-- If we were hosting a dinner party and I'm cooking dinner for you, we can still interact, but I'm in my workspace, and then you're not-- You know, we're not tripping over one another.
Kevin: So I would be sitting here in the nook drinking a beer, watching you make me dinner.
Dan: That's right.
Kevin: Okay, and then when I came into the kitchen earlier, there was a-- just a studied partition wall here.
But you've got plans for in front of it?
Dan: Right.
So we're building an appliance garage, breakfast bar over here.
We've got a sink built into that space.
Kevin: So I pointed down to the mudroom entrance.
That's down a couple steps.
Dan: Right.
Which used to be the old bathroom.
Now we get that mudroom access into the house.
What was the old bathroom, we've moved that over here.
And a new wider set of stairs here to get into that family room.
Kevin: Wow.
And you even have couches.
I presume the facility provides these?
Dan: Correct.
Right.
So that we have the ability to lay this out and make sure that you can feel comfortable, right?
Those move to make sure that your furniture is also going to fit into your space.
Kevin: So in real time, you can have an argument with your spouse about where everything goes.
Dan: Right.
Kevin: That's pretty cool.
Alright, well, I'll let you fuss with it, but I'll get back to the job site and help them bring it to life.
Thank you.
Dan: Sounds good.
You're welcome.
Kevin: Can I go out this door?
Dan: You can go out that door now, yep.
Kevin: Awesome.
Dan: Alright.
Take care.
♪ Zack: So, Jenn, when a homeowner says to me, "This house has good bones," what are they really talking about?
Jenn: I mean, I think of the structure and the strength of the house, the 2x4's that built it.
Zack: Yeah, so 2x4's are most of the lumber package, right?
And this is four 2x4's we removed from the house.
And these four 2x4's are new offcuts from what we're bringing in.
They look quite different, don't they?
Jenn: Yeah, what I notice is the grain, how tight these rings are, and just how tight this wood is.
Over here, the rings are further apart, and it just looks like a softer wood.
Zack: Right.
So what do we need to understand about a tree to get more information about a 2x4?
Jenn: Okay.
So this is a piece of conifer.
Either a fir or a pine.
So there's four parts.
We have the bark on the outside.
Then you have the sapwood.
And then it goes to the heartwood and then the pith.
The pith is the center of the tree where everything forms from.
And as you go out, each of these rings indicate one year of growth.
So the inside of the tree is the hardest part of the tree.
It's called the heartwood.
And that's where you get a lot of your lumber from.
Zack: But the size difference is what I really notice.
When people think of a 2x4, they think it's 2 inches by 4 inches, which is what this is.
But here, what modern 2x4's are, are 3.5" by 1.5".
Jenn: Why is that?
Zack: I'm gonna say shrinkflation.
Jenn: Okay.
Zack: I think they still cut a 2x4-inch board out of a tree, but then they actually plane it down for consistency to get these all the same size and sort of smooth them out.
So because this wood from 1893, right, was from a big tree, there was more opportunity to get that heartwood.
It just performs better.
It's denser.
It's more stable.
It's straighter.
And it has more strength.
But getting this is not an option for us, right?
Jenn: Right.
Zack: Because this came from a farm.
And I don't know where that came from.
Jenn: These just grew, and then these grew to be cut, right?
Zack: Right.
So this is so affordable that the house is engineered to work with this product.
The only time where these really fall short is sort of stability and straightness.
And we find it's cheaper to use something called an engineered stud.
It's wood chips and resin.
This is something we would use if we had a wall that was 12 feet tall or we were gonna put tile up and we needed everything laser-straight.
It's more expensive than the regular 2x4 that's farmed, but way more affordable than trying to find something like this.
Jenn: Okay.
Can you just please tell me you use this somewhere else in the house?
Zack: Well, we probably won't use the 2x4's after all.
Paying a carpenter to remove nails when I could pay, you know, the same amount as an hour to get 20 of them.
It just doesn't make sense.
Jenn: Just doesn't make sense.
Zack: But if we have bigger floor joists or rafters, we will save those, and we can make furniture or different details within the house out of them because it is a fantastic product.
Jenn: Alright.
Maybe you could just make me some salad tongs or something.
I would be happy with that.
♪ Zack: So whenever you're in an old house, one of the things you might notice is that the floors are a little wobbly, right?
A little out of level.
And whenever I experience that, I go to the basement and I look for those penetrations that come through the floor system, such as chimneys, plumbing, HVAC, and, most importantly, stairs.
That's a big hole.
And right here, this thing is out of level pretty bad, and that's causing the floor to really sag over here.
Kevin: Sagging a lot.
I tossed this on earlier looking to replicate that.
If you go to the low spot.
Zack: Alright.
Kevin: You tell me where I need to be until that bubble shows us level.
Zack: A touch higher, please.
Yeah, that's about good right there.
Kevin: So that means your side is down... It's almost an inch and 5/8.
Inch and 3/4.
Zack: Yeah, which doesn't seem like a ton until you know that I've been jacking up on this part for about a month trying to remove that sag.
Kevin: A month.
Zack: Yeah.
Kevin: Okay.
A lot of weight on it.
Alright.
Zack: So not only is this sagging, but also we'll notice that this double, the one part of it has really been deteriorated and compromised.
And it's checking and cracking.
And then this double... So the original HVAC contractor cut this massive hole here, so this is compromised, so I want to replace both of these.
Kevin: So you're saying this double's coming out.
And then how much of this double?
Zack: This one's gonna come out this side, and we're just gonna sister on with a new one.
This one's actually in surprisingly good condition.
Kevin: Alright.
And so Mike and I were working on this temporary wall right here.
We can finish that, and then we can start demoing?
Zack: Yeah, we'll jack up on these, try and transfer the load from this to these temporary 2x4's, and we'll be good to go.
Kevin: I'll get you right there.
I'm good there.
Let's line it up for you, Zack.
Zack: So you guys cut this a little long, so this should act like a jack and transfer that load.
Kevin: I got another one.
Zack: Alright.
Let me measure that for you.
Kevin: Looks pretty good right there.
Zack: Cut it to 76 and 3/4".
♪ Alright.
♪ ♪ ♪ Glues and screws!
♪ A little more.
A little more.
Hold.
♪ Bring this in after.
Kevin: Oh, look at that.
Zack: Ready?
Kevin: Yeah.
Zack: So these joist hangers for the historic joists are actually 2 inches instead of inch and a half.
So you can see a new joist just rattles around in there, but it'll fit perfectly on these old ones.
♪ ♪ Alright, Kevin.
So let's unscrew these.
Take the supporting wall out.
If it looks good, then we can take this jack out.
Let's slowly back the pressure off this jack.
Kevin: I can hear it.
Zack: Yeah.
That's it.
That wasn't too bad.
Kevin: Not too bad at all.
Let's clear that out.
Zack: Now, this column here is pretty deteriorated at the bottom and the top, so we may end up having to swap this out, but we're waiting for our masons to tell us what to do there.
Kevin: Okay.
Good industry.
Thank you.
Thank you, Mike.
♪ Richard: Here in the first floor, we needed a space for a half bath.
And the only logical place, it turns out, was at the intersection of the living room, the kitchen, and the family room right here.
It's relatively small.
So we need a toilet and we need a lavatory.
Now, a conventional toilet would come out to about here, and that really challenges the door swing or even having enough room.
So that meant we're gonna go with a wall-hung toilet.
Helping us on this project is Kordian Rak again.
How are you, my friend?
Kordian: Good.
How are you?
Richard: I see you've got a little plumbing showroom here.
Kordian: I do.
So here I've got a conventional toilet where you have a lever here, flush-valve assembly, all inside this tank.
Richard: That's the toilet we all know.
It's either a two-piece or one-piece like that.
Now, a wall-hung takes everything that's inside that tank and pushes that tank inside the plane of the wall, and that really changes everything.
So instead of having a tank lever like this, you've got a button that will flush the toilet.
This is what it looks like on the outside.
And it has a lot of advantage, doesn't it?
Kordian: There's a lot of advantages to that toilet because you can clean the floor a lot easier.
Richard: Because it hangs on the wall.
Kordian: Since it's wall-hung.
Right.
And then there's also a lot of space savings that come with that toilet.
Richard: That's really something.
When you see it here... Now, here's the finished wall right here.
And we look here.
And that's 21 inches out to here.
And what is this?
This is... Kordian: 31 inches.
Richard: 31".
So that's big.
9 or 10 inches.
That's great.
Alright.
A little more work, though, to put it in then, right?
Kordian: Yep, so with these toilets, the wall-mounted ones, we're gonna have to install this carrier inside the framing.
Richard: Okay.
So it has to be done correctly the first time and securely.
Kordian: Okay, so the critical part of this installation is getting this carrier just right horizontally and vertically.
Richard: Yeah, and he's framed that perfectly, it looks like, already, which is great.
Kordian: Yeah, they also gave us the height of the toilet already that they want.
And so that allows us to have an ease of installation.
Richard: So Zack even made a cross-section of what the floor is going to be so you know your height with the tile.
So that means you could actually preset your legs for your carrier.
Kordian: Then I can secure this carrier in and zip it in and have it all secure.
Richard: And just bolt it in place.
Yeah.
That's not going anywhere.
Alright.
Let me jump in there with this back wall.
Why don't you grab the bowl?
Kordian: Okay.
Richard: Alright.
So now this is gonna be behind our toilet.
We got our two carrier bolts here, our two holes for our drains.
But also there's an additional hole here and here for the electrical and the water for the bidet toilet seat we're going to add.
Okay.
So those bushings are really important.
They're gonna carry all that weight of the china.
That's great.
Alright.
Why don't you grab that seat, Kordian?
Perfect.
Let me fish these down through.
Alright.
Well, look at that.
A bidet toilet seat.
Perfect height.
And plenty of room.
I mean, we've really gained a lot of space here.
It's a little bit more money for a wall-hung toilet, but I think it's worth it.
Kordian: Thanks for your help.
Richard: Alright.
♪ Zack: Let me give you a little status update on the schedule, Kevin.
Kevin: You got your Gantt chart up.
You live by this thing.
Zack: So all these things are things we've completed.
Kevin: The X's.
Zack: Yeah.
As of right now, we're about a week and a half behind where we'd like to be.
It's showing that we should have plumbing complete.
Right now we don't have plumbing complete.
So what I really need to do is just have a lot of communication with the homeowners, make sure they're aware of what they're getting, make sure they're sure of their selections, so hopefully we can consolidate some of these timelines to get that week and a half back.
Kevin: Awesome.
Well, I know one guy who's definitely not slowing you down: Charlie.
Let's see how he did.
Zack: How's it going, Charlie?
Charlie: Hey, Zack.
Kevin.
Kevin: Looks like you made some progress.
What'd you get to?
Charlie: Yeah.
I added two new studs after I found my center.
Some blocking installed for the valves.
I've got my shower head marked out.
You can see the center of my thermostatic valve is the center of my pan.
It's the center of a tile, and it also is the center on my story pole, either on the edge of a grout line or the center of a tile.
And you can see that my transfer valve horizontally lines up perfectly with a grout line over here on my story pole.
Kevin: That's awesome.
Does it get you excited to see this, sort of knowing that when all the fixtures are in and everything lines up dead nuts, the grout lines and tiles?
Zack: It'll feel good if we get it right.
Kevin: You will.
Alright.
So what have we got coming up next time?
Zack: Now we can go ahead and get our plumbing roughed in now that this is done, and we're ready to electrify the whole house, so we'll be rough in for electric.
Kevin: Beautiful.
Alright.
Well, that's what we're gonna bring you next time.
So until then, I'm Kevin O'Connor... Zack: I'm Zack Dettmore.
Charlie: I'm Charlie Marshall.
Kevin: ...for "This Old House" down here in Essex County.
So this is a long way to go, but I can see how satisfying it's gonna be.
♪ Kevin: Next time on "This Old House"... Richard: Rough plumbing is under way.
And the sign of good plumbing?
It isn't seen... and it isn't heard.
We'll show you how to make that happen.
Zack: How do you waterproof a low-pitched roof like this one?
We'll show you how.
Kevin: And I'm at a park with more cherry blossoms than the Tidal Basin in D.C., and we're just four miles from our project house.
Kevin: That's next time.


- Home and How To

Hit the road in a classic car for a tour through Great Britain with two antiques experts.

 New Episode










Support for PBS provided by:
Funding for THIS OLD HOUSE is provided by The Home Depot and Renewal By Andersen.